With about 90 seconds of effort, you can improve your online security and block most malware. This article introduces the purpose of Private DNS services. But for a lot better privacy than this article produces, head to my related article, Block your privacy leaks in just 10 minutes with NextDNS.io.
If your device runs Android:
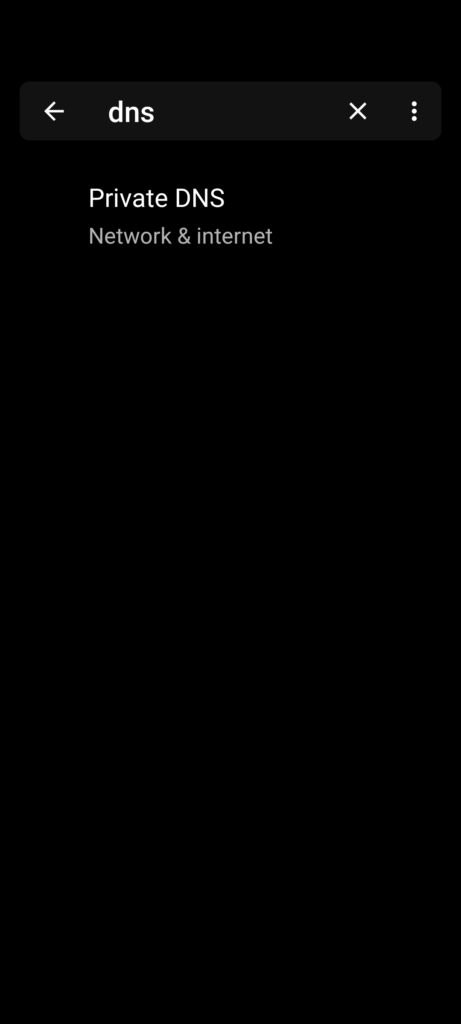
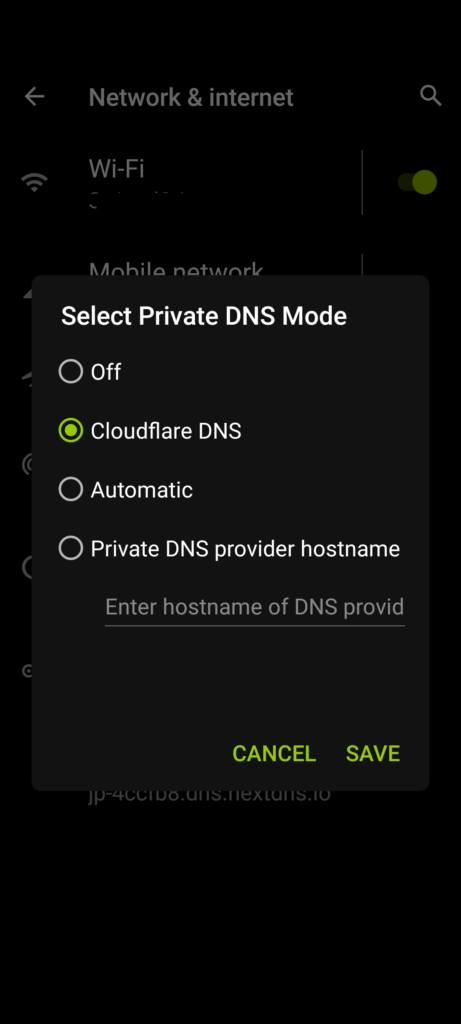
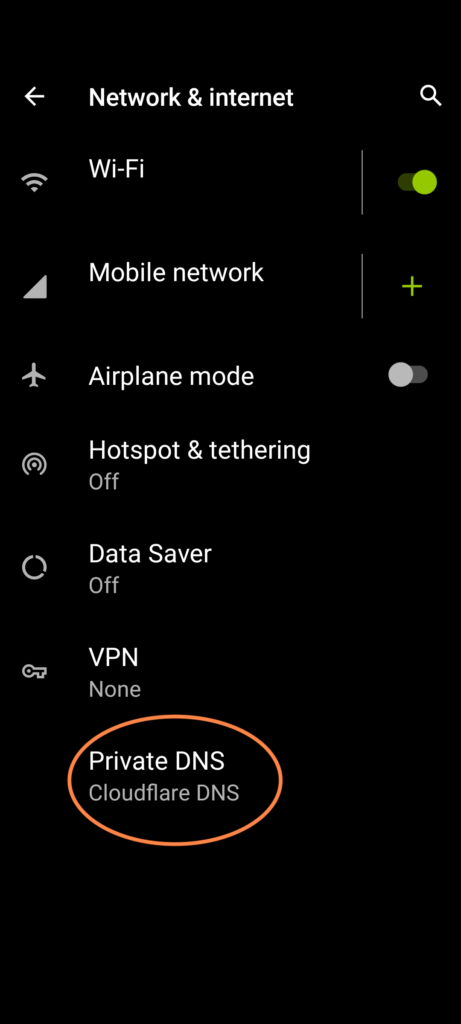
Open the Settings App and search for “DNS”. In Android version 9 or higher, you’ll have an option called “Private DNS”. You definitely want this feature enabled. So “Off” is no good and “Automatic” isn’t actually much good either, because that only helps in extremely rare cases, and not when your device connects to other networks.
The simplest to start with is to just select the “CloudFlare DNS” option. (This is the same company and service you might have seen called 1.1.1.1 or one.one.one.one.) That’s all you have to do! Read below to see what this does for you. Complete details are at https://developers.cloudflare.com/1.1.1.1/setup-1.1.1.1/android If you have an Android device older than version 9, you can get the same result using their free App.
If your device is an iPhone or iPad:
You can manually configure iOS to use CloudFlare with WiFi, but for an iPhone, you’d also want it operational when you’re on cellular data. So for that I think you have to use CloudFlare’s App. Details at https://developers.cloudflare.com/1.1.1.1/setup-1.1.1.1/ios
WHY does this simple change improve your security and slightly improve privacy?
Reason #1 – Stops DNS “snooping” & unethical redirections
When your device connects to almost any service on the Internet, it has to look up the DNS name (e.g. “thinkingprivacy.com” to find out the numeric IP address (e.g. 3.130.56.219). But until you turned on Private DNS, your devices was always sending those queries unencrypted and they send them to whichever DNS server your current network connection says to use.
Therefore, when you were at home on WiFi your Broadband Internet Service Provider (e.g. AT&T, Comcast, etc.) was seeing and recording EVERY DNS request coming from your devices in your house. And when you were on Cellular Data instead of WiFi, your Cellular provider was recording and analyzing the same information! That is true EVEN when you’re connecting to encrypted websites (those with https://whatever…) — even though the DATA that you exchange that way is encrypted, the DNS request to find the service address was viewable.
In some situations, those ISPs will even use DNS in unethical ways, misdirecting you to the sites they want to promote, especially if you accidentally mistype a URL or click a broken link.
UNTIL NOW. By enabling Private DNS, it tells your device to always send its DNS lookup requests to the service YOU chose (e.g. CloudFlare, NextDNS, etc.), no matter what network you’re on and to do it using encrypted communications.
CAVEAT: Even with encrypted “Private DNS” enabled, your network providers can STILL see which systems you’re communicating with, through traffic analysis. The only way to also stop that from happening is if you also enable a VPN (Virtual Private Network) app or use the TOR Network.
Reason #2 – Security & Basic Content Filtering
CloudFlare and NextDNS can also be used to block accidentally going to many known malware sites (viruses, id theft, phishing, ransomware). If you’re concerned about your young children seeing adult content, you can also choose whether to block a lot of adult-oriented sites with a simple change to the Private DNS settings.
There’s More!
If you’ve just discovered the benefits of Private DNS, I hope you learned about it here. But if you’re reading my blog, you probably care a lot about privacy. So before you spend time going around to every device you own and changing it to Cloudflare’s DNS, read my follow-up article about why we switched from CloudFlare to NextDNS a couple of months ago. It’s awesome.

